Mounting a Sprung Solo Seat
Mounting a Sprung Solo Seat
By bungking
In this post I will show you how to mount a sprung solo seat using our seat pivot as well as our seat spring perches.
I will start with an aftermarket chassis that is an early reproduction frame with a fender and tank already mounted in place. I recommend not installing your seat until you know exactly where both the gas tank and rear fender are going to live so you can really see what tis going to look like as well as it’s function, not hitting the fender and chipping the paint when the springs are fully depressed. Leave a little extra clearance for the seat pan under full compression , most pans especially those with a lot of cup or arch in them tend to deform back toword the fender under load.
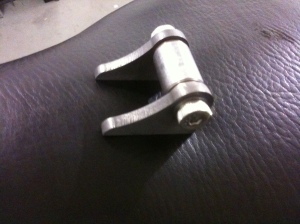
I am going to be using one of our Front Seat Pivots fromwww.bungking.com for use as a front pivot for this build. The pivot has two flanged bronze oilite bushings in the locations where any continued rotation is going to be for extra long life without any wear and built in lubrication. To lock down the bushings and the center bung the kit comes with stainless shouldered bolts and correct shim washers, the shoulder allows you to tighten the shoulder tightly against the bung to keep the bolt from loosening but allows enough clearance for bind free rotation. Most people and manufacturers don’t understand how important keeping a tight slop free front pivot is, if the holes or bolts gain extra clearance over time with just springs on the back your seat will flop back and forth every time you shift your weight or take a turn making it worse and worse over time.
Because all seat pans and chassis are different we do not send the pivot out with a tab with pre drilled holes, this would limit you to your seat location. Most of us who have a welder have the ability to drill two holes in a piece of flat stock so do so in a location that fits your needs and tack the flat stock to the threaded bung that comes in the kit.
Once it cools off enough to not burn the leather on your new seat bolt the strap to the pan and assemble the front pivot to ge it ready to moch it up in it’s location on the frame.
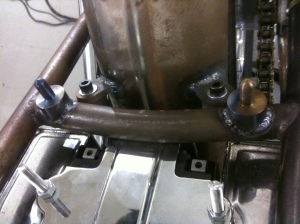
Once the seat pan is mocked up in its correct location front to back as well as side to side on the chassis it is time to tack the two tabs to the chassis itself.
With the front pivot located it is time to locate the back of the seat pan, in this case the customer wants to use round or beehive style springs to support the back of the seat. Most solo seats have bungs welded to the pan to locate the top of the springs, the bungs seen above are our Seat Spring Perches that we offer at www.bungking.com . The pin will locate the bottom of the spring to the chassis but allow you to quickly raise the seat to allow access to the battery or oil filler cap if needed. Some manufactures add a horizontal hole in the pin to be able to insert a hitch pin in place, however on paper this looks good as soon as you sit on the seat and the spring compresses 90% of the time the spring will bend the hitch pin in such a way that you will need to use a set of pliers to remove or in worst cases have to cut them out. If you set them up right a pin is not necessary it is more of a hassle than anything.
This is the Seat spring perches tacked in place, we offer them on either a 1″ or 1 1/4″ cope dia to fit your needs. They can be found athttp://www.bungking.com/accessories/seat-parts/seat-spring-perch-mount.html. If you weld the perches with the pins tilted slightly back at an angle this will resist them coming off of the pin when you do not want them too but still allowing you to remove them when needed.
After all of it is tacked into place remove the pan and the springs and fully weld all of the parts to the chassis.
After all of the parts cool to the touch you can install of the parts back in place to check all of there fitment and admire your work.
Explore Popular Articles
Nate’s Shovel
September 10, 2011Nate’s ShovelBy bungkingThis bike was built completely from scratch using all new...
Gary's CFL
September 10, 2011Gary’s CFLBy bungkingThis started as a standard CFL chassis. I dropped the neck do...
JD's Shovel
September 10, 2011Jd’s ShovelBy bungkingThis Bike started it’s life as a stock swingarm frame FL, We...


